Wednesday, 3 July 2013

Mother Theresa Frame

Recently I done another frame with a quote from Mother Theresa and must say I am so very happy with the outcome.J

Knowing that one of my best buddies at work Melissa is going to missionary work in Ethiopia with the Living Waters, decided to make her something for fundraising. So I got her into choosing a quote as resectly she was reading her biography and  looking at her FB status you always find a good quote that make you reflect.

The work that this mission is doing is incredible, children having schools, people having a home with fresh clean water in the villages and mostly the word of God. All this is with the kind help of the Maltese people nation which is very generous and kind in every situation. I am so proud of her that she is leaving everything behind  for 5 weeks, to make a difference in these poor people lives.

Many times we complain for going to work or for finding something different to eat on our table than we expected ... while we complain and grumble about everyday simplest things, let us be grateful for all that we have...to have a roof on your head and money in your pocket to buy everyday simplest necessities is already a blessing. We are already lucky enough to have schools, so we can educate ourselves, let us not waste that positive energy. 

Have a great day dears xx.


Supplies List
  • A frame A4 size is perfect
  • Card for backing
  • Stamps 
  • Distress Ink Pads
  • Ink pads
  • Embellishments
  • Old Dictionary paper
  • Seam Binding Ribbon
  • Paper flowers by I am Roses
  • Washi tape
  • Faber Castell - pitt artist pen Manga black set


For the backing effect with lines no stamp was needed. Some time ago i saw a crafter somewhere on You Tube using an old credit card. Simple to do, dip one side on an ink pad and then stamp it on the card in the desired angle, and voilĂ  there you have an interesting background without spending money on stamp.


After cutting 6 layers of petals for the flower colour them with distress ink and marked close the edges with a fine tip. Finally done the stamping on the flower petals. To make the center of the flower used a clock stamp.


Let us always meet each other
with smile, for the smile is the
beginning of love.

Mother Theresa


Sunday, 23 June 2013

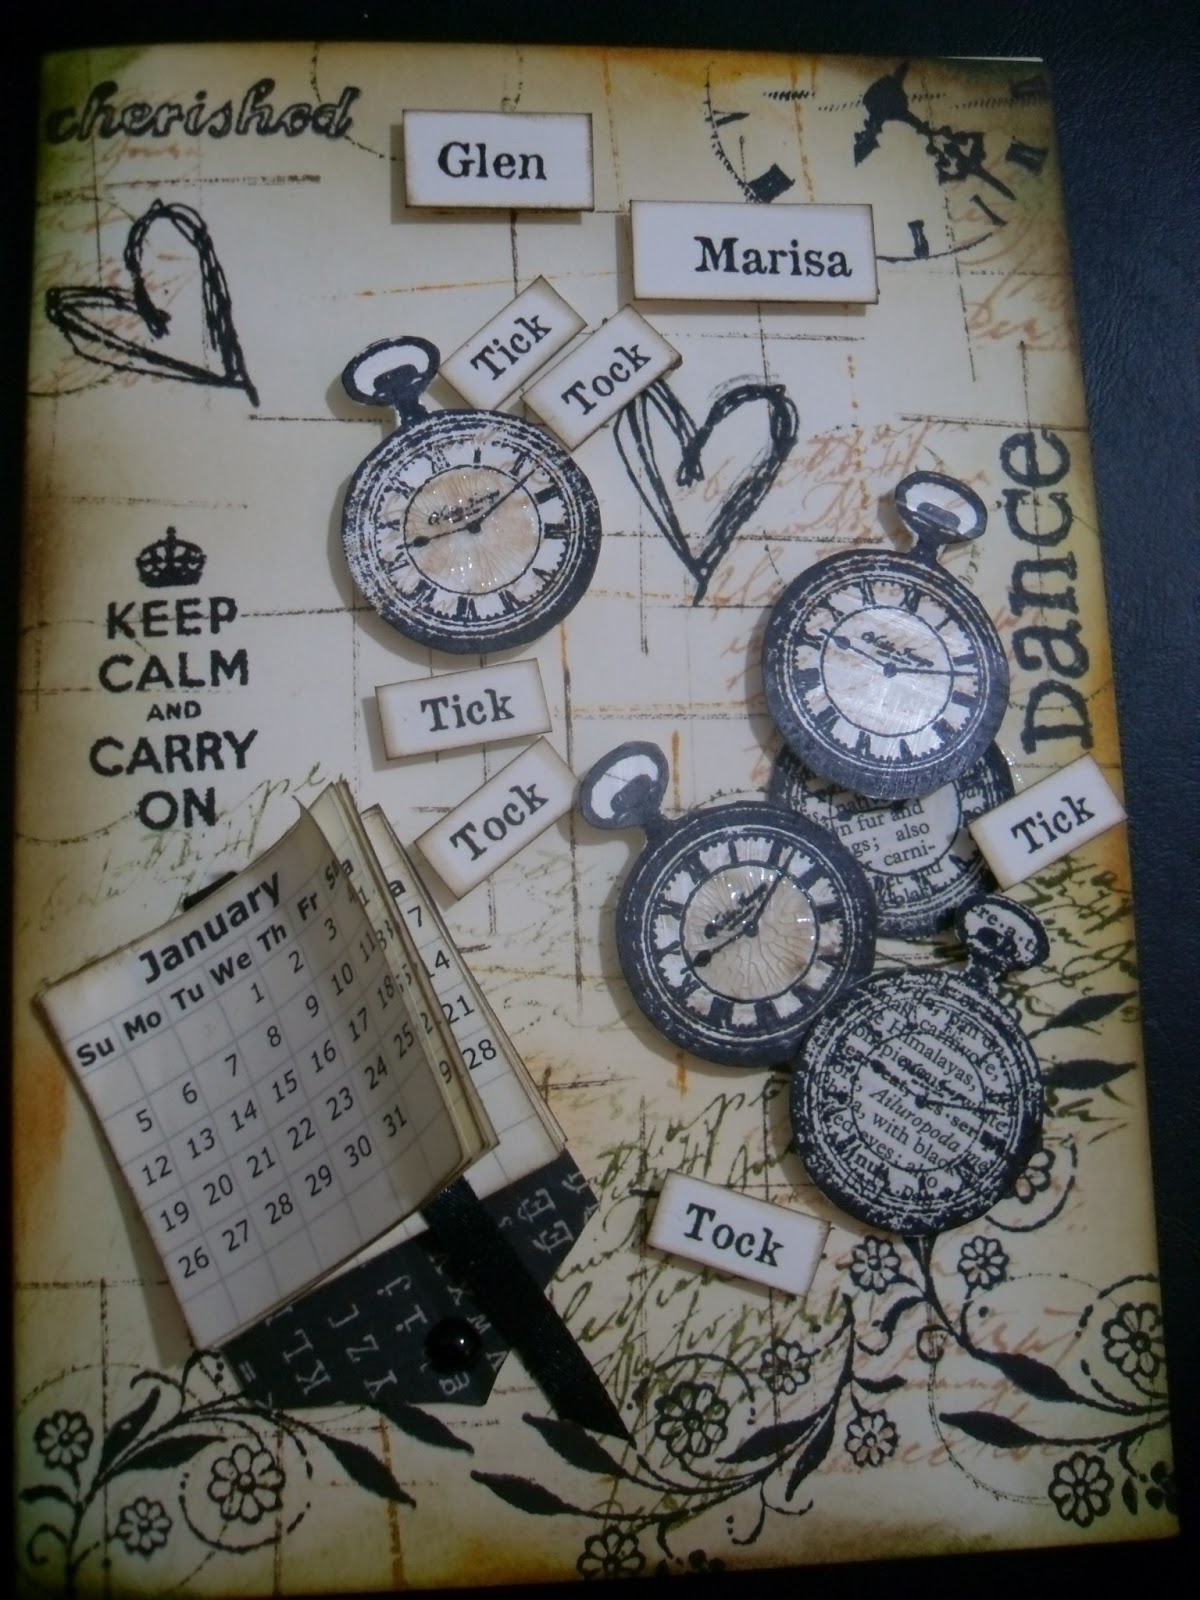
Tick... Tock... Time is Ticking

Hello dear friends Good Morning  J how are you?

Finally I have some time to sit down here and dedicate  couple of hours to my blog!  How I just wish I had more time to work more on cards and also jewelry as it’s something I also love doing. That gastric virus threw spanner in my wheels but thank god I am back to normal and mind bit focused on work.
Lately I had been working on plenty of cards and some Holy Communion stuff which later on I will post on this blog.

So for this card the motive behind it was sweet and lovely. The bride to be wanted to remind her fiancee that in a years time they are going get married... hehe better remind him and get him prepared ;) … sorry guys I am being a bit cheeky here J.

Supplies list
  • A4 ivory card
  • Dictionary paper
  • Distress ink pads
  • Black - Adirondack Ink Pad
  • Ribbon
  • Various rubber stamps by Tim Holtz, Visible Image & Prima and other brands which I don’t remember
  • Lid from a jar
  • Old visa card
  • Ranger Crackle Accents


For this card I used mainly plenty of different stamps. For the back ground  used a calligraphy stamp after inking and distressing edges. With an old visa made like fine lines vertical and horizontal, and circles with the lid. At the bottom applied the flowery stamp design and followed up by stamping the clocks on various types of papers. Next step was cut them out and embellish some of them with Crackle Accents and left them to dry out.


After the clocks were set in place, the next step was the calendar.
At one other side of the card made a mini calendar, which I downloaded from this site http://www.calendarlabs.com/ and really found it very useful. Glued it all together and made a little book mark with a piece of ribbon to mark the month, also marked their wedding date and finally attached it to the card. Once I had the setting done, added some more stamping. 
Above the calendar stamped the famous “Keep Calm and Carry On” I just love it and it goes back to the beginning of the Second World War to keep the morale high of the British public.
Around the clocks applied the wording tick tock to show that time is ticking up  to their wedding day and finally their names ... and yes, now the bride and groom started the countdown for their special big day J


Sunday, 9 June 2013

Christening Cards

Good evening or good night, as for me it`s already bedtime. These few days I haven`t been too well, seems some viral thing is  up in the air with all this sudden weather changing. I had to make an effort to sit down a bit in here drop a few lines and don’t want to fall behind with my posts.  While I Hope you all had a happy a Sunday J wish you plenty you lots of love and laughter xx

These are two christening cards i done recently for a relative of mine.
On the first card I kept the neutral colours and creamy look and for the second one based it with shades of pink.

Supplies List
  • Lace ribbon
  • Satin ribbon
  • Gauze ribbon
  • Satin & lace material
  • Pearls & rhinestones
  • Buttons
  • Embossing powder
  • Rubber stamps
  • Acrylic paint
  • Flowers
  • Sizzix Bigz Die - Tattered Florals


The flower was cut with Sizzix tattered flowers and the center was made with 3 circles smaller than each other. Then I burnt out slightly the edges with a candle to give it that crumble edge.


For the background after stamping with some calligraphy, applied some pearlised pink acrylic paint. Just some light brush strokes, vertical and horizontal. The butterflies stamped and embossed with white embossing powder and cut around and gave them that 3D look.


At the end arranged the flowers in the desired design. 


Thursday, 30 May 2013

Easter Cards

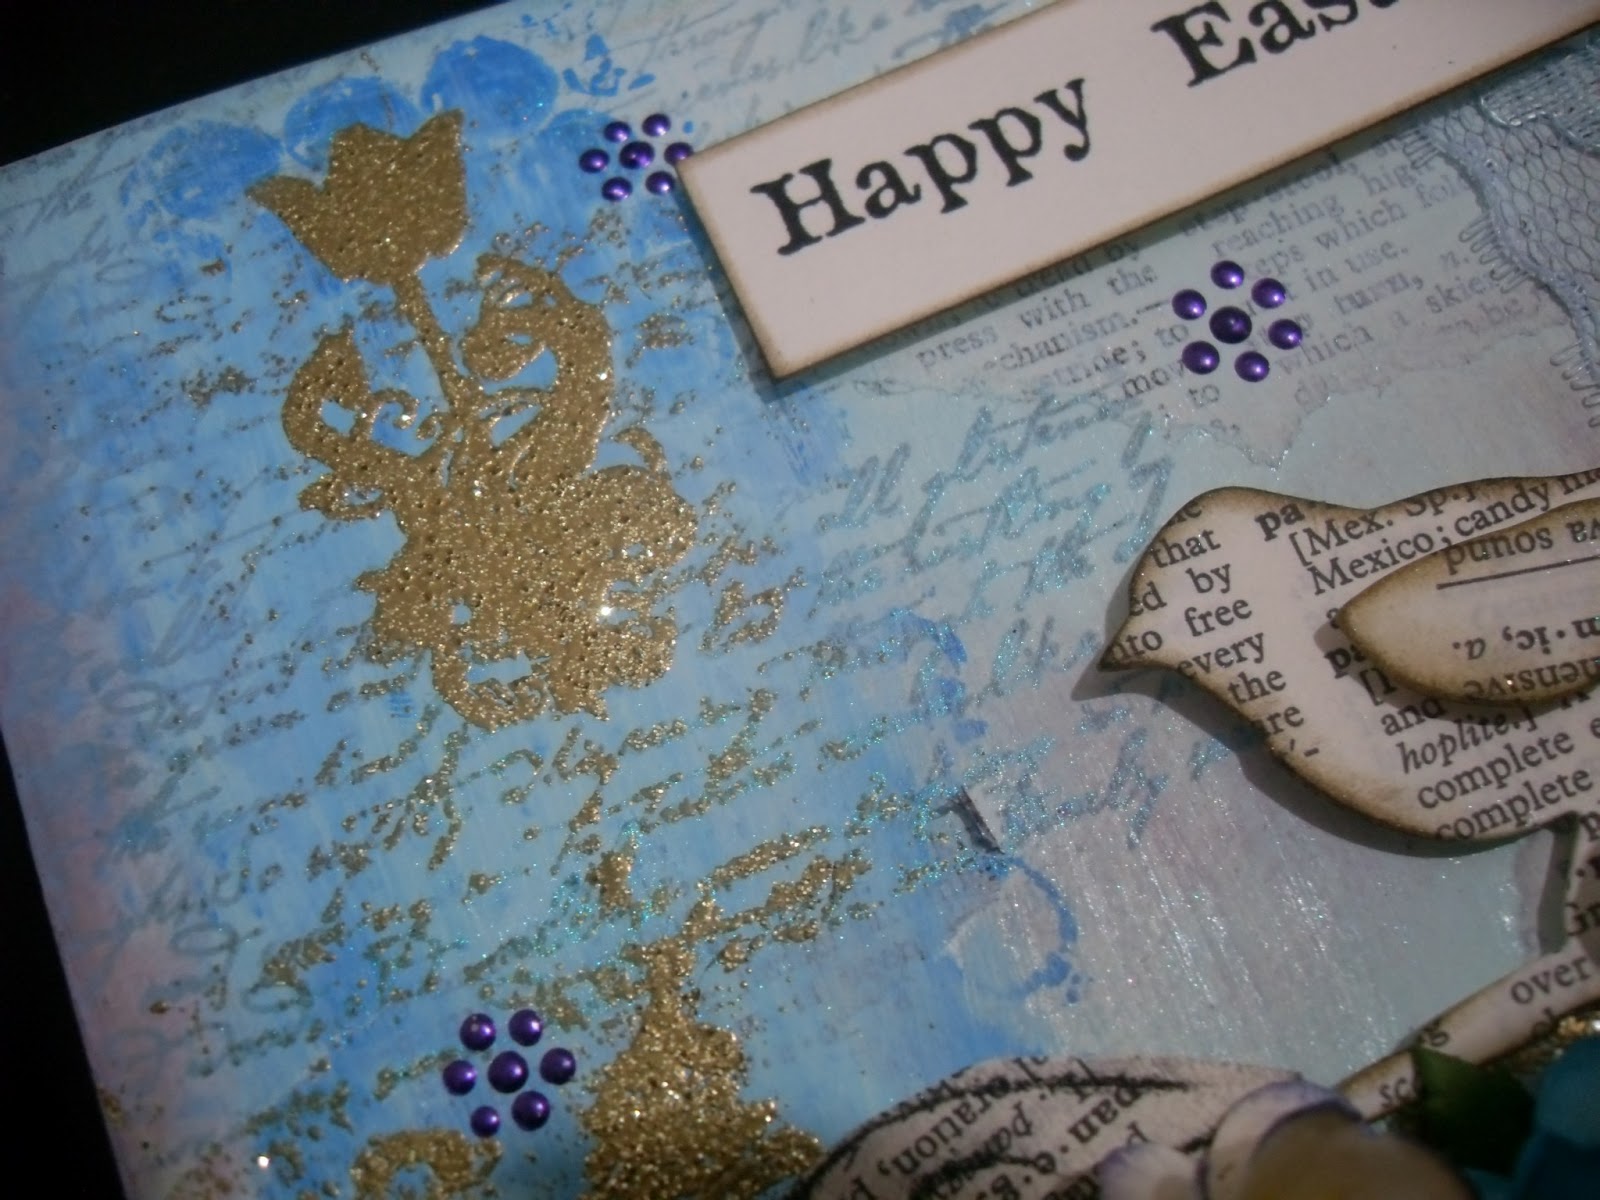
As Easter came and passed so fast and I was busy too with some cards. This is my first ever cards I done for Easter and honestly they are the best of my favourite cards I done so far. Easter reminds about birds chirping in their nests, the air starts to get a bit warm and the flowers starting to bloom. Usually I used to take my first swim at Easter like many others.  We also do have our traditional food for Easter like the "Figolla". It`s a sweet pastry cut in a character and filled with almond mixture and the top decorated with icing paste and on top of it an Easter egg.

Now let’s get back to the real subject as sweets are my biggest distraction. J  For these cards i tried to experiment as much as possible and I am quite satisfied. I always try to experiment and mess about in crafts.

Supplies List
  • A4 card stock
  • Dictionary and old book pages
  • Perfect Pearls mist
  • Embossing powder
  • Charcoal pencil
  • Distress ink pads
  • Lace
  • White gesso
  • Mod podge
  • Stamps
  • Stencils
  • Flowers
  • Liquid pearls
  • Sizzix Bigz Die - Caged Bird
  • Sizzix Bigz Die - Tattered Florals
  • Acrylic paints 


The leaves were cut free hand from an old dictionary book, sketched the edges and inside of the leaf  with a charcoal pencil.


The flower was made from and old book and water coloured and edges inked with brown distress ink.  Then glued all the petal layers 6 in all and misted on perfect pearls. When all dry, normally I use a heat gun to hurry up the process, added a button to the center of the flower.


For the background applied pieces of book pages then applied gesso and then the acrylic paints. For stamping I used distress ink pads and on some of the stamping applied embossing powder


For the largest flower I recycled a coffee cup heat protector J  as long I don’t get any free coffee no adverts in here… hehe 


Don’t be afraid to mess about with the paint brush as you can really create fabulous textures. I do have any art experience except a little bit of art lessons at school.  For the cage gave it a little of embossing powder. 


Wish you all  a great day whether the sun is shining or not ! J

Carmen xx


Monday, 27 May 2013

Symphaty Card

Good morning Sunshine’s!! The weekend is gone and another week is starting to roll over J

Although I do enjoy making cards, this was one of those cards that you don’t enjoy doing at all. It made me sad while also shocked, at the tragic loss of this young man. More over when this person is a relative of one of your closest work mates. May his soul rest in peace!

While doing this, had some time to ponder and reflect... that life is too short to worry about and waste… every second from our precious life is worth like a million years and every day is a new beginning. Do what you like doing; be with the ones you love, that bring joy and happiness into yours. Don’t waste time hating the people that move away from you. When things are meant to be, happen when you least expect them. Things always happen for a reason, even from the most negative situation something positive comes out. Love yourself and give love back... mostly to the ones that hurt you, even if they don’t even notice…   Always forgive as you like to be forgiven!!

Most of all be grateful for all the people you have in your life and everything that surrounds you…

I wanted to keep this card simple as possible and preferred to focus on the message. So I went for a verse from the bible.  Next to the wording stamped 2 sparrows and at the bottom I made a gate with some flowers on and the title of the card. For colour I preferred to stay on my usual soft tone.

Lots of love Carmen xx


Blessed are those who mourn, 
for they shall be comforted. 

Matthew 5:4


Monday, 20 May 2013

A Mother`s Frame

Another project I done for mother’s day was this  decorative frame.
For this project all you need is plenty of patience, good mood and some creativity in poetry or else search  the net J  It can be fun and original as much as you desire. Actually I enjoy doing this sort of memento frames as they can be very relaxing.


This one went for one special mother with a beautiful name Rose. A kind and bubbly person that type you would never get tiered staying around her. She is my dearest friend mother, Odette or else as I call her Det. She`s my virtual sister as we both don’t have any sisters, so we found the comfort of sisterhood in each other.  Only one thing separates us ... the miles between our homes, but still one phone call away as we do frequently catch up with everything that is going on in our lives. The most beautiful time we shared together was when the day for her to say "I Do" arrived, I had the pleasure to be her maid of honour J


Well I started the frame by attaching an A4 paper in the frame. In this case I prefered a blank paper so I would decorate it up myself. Next step I did was attached half of the page with the curtain lace fabric.
The other half I stamped it and covered with perfect pearls. In the middle attached in the middle the guipure lace.
After I had chosen the poem I prepared to print it out. Normally I prefer to use Albertsthal Typewriter in black.
Leave a good space between every verse, so you have enough space for cutting out.
 Once each verse is cut out, distress the edges, I prefer brown.
Then lay out the poem and leaving enough space for the arrangement.  Then I arranged the flowers to the desired pattern.
Finally attach the poem verses to the frame using sticky foam in the line you already set up.

Supplies list
  • A4 ivory cardstock x2
  • Resin flowers
  • Paper flowers
  • Silk flowers & leaves
  • guipure lace
  • Perfect pearls
  • Rubber Stamps
  • Fimo clay
  • Craft mould
  • Lace curtain fabric
  • Double sided sticky foam


 At one corner arranged an assortment of silk and paper flowers.


For this cabochon I used Premol Sculpy Accents in pearl.  Worked the clay until it got soft and after I molded the clay into the silicon mould, took it out gently from the mould and baked it for around 25 minutes. Ohh!  by the way besides sometime in my life I burnt food as I got lost in something else, I just also learned to burn clay J  Haha ! Well as we all say with mistakes we learn!  When it was ready and done left it to cool and then I embellished it with some lace at the edges.


Thursday, 16 May 2013

Priesthood... 50 years

It was quite a bit of worry when I was asked to do some cards for a priest, as it is not a subject we come across  frequently.  He was going to celebrate his 50th anniversary. Thinking and thinking soon I came with an idea that the main subject has to be to be kept simple as possible. So the main focus had  to be the holy cross.


Supplies List
  • A4 card stock
  • Embellishments
  • Skeleton leaves
  • Distress inkpads
  • Flowers
  • Sizzix Bigz Die - Ornate Crosses
  • Perfect pearls
  • Stamps - Various 
  • Sizzix Textured Impressions Embossing Folders  - Blossom, Circles, Leaves & Diamonds Set 


For this one the back ground used an embossing folder and the edges were hand cut roughly and distressed at the edges. The cross was bought some time ago on eBay, as i do not have many die cuts.


For this card  the background was stamped and perfect pearls were used over, to give it that copper look. For the cross the Sizzix ornate crosses die cut was used